-
Login
-
Language
- Deutsch
- English
Requirements
- Thunderbird should be installed on your Computer.
- You should have access to the groupware.
- Active internet access.
In the following steps, we will explain how you can add your your groupware address book into Thunderbird and what the settings are to synchronise your address book.
Start with step 1.
Step 1
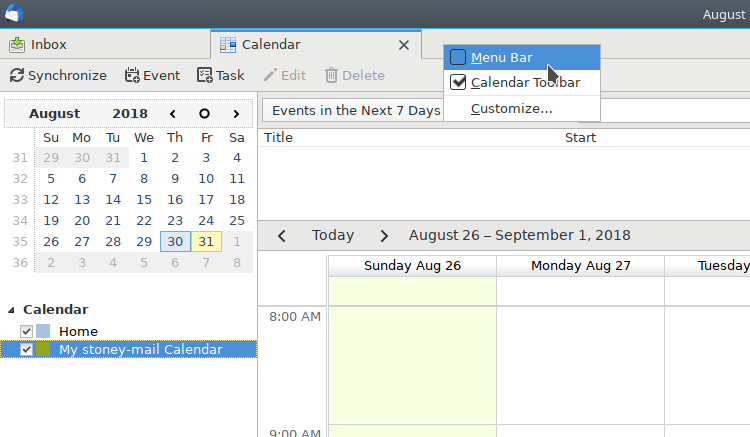
Make the Menubar visible by right clicking next to the open tabs and selecting "Menu Bar".
Step 2
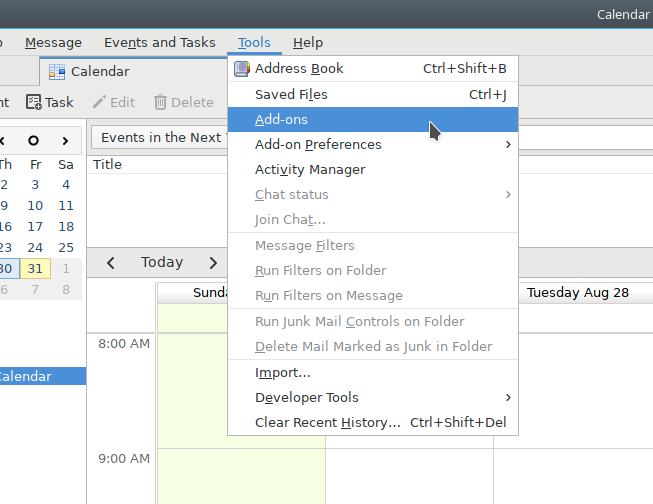
Go to "Add-ons", which you can find under "Tools" in the menu bar.
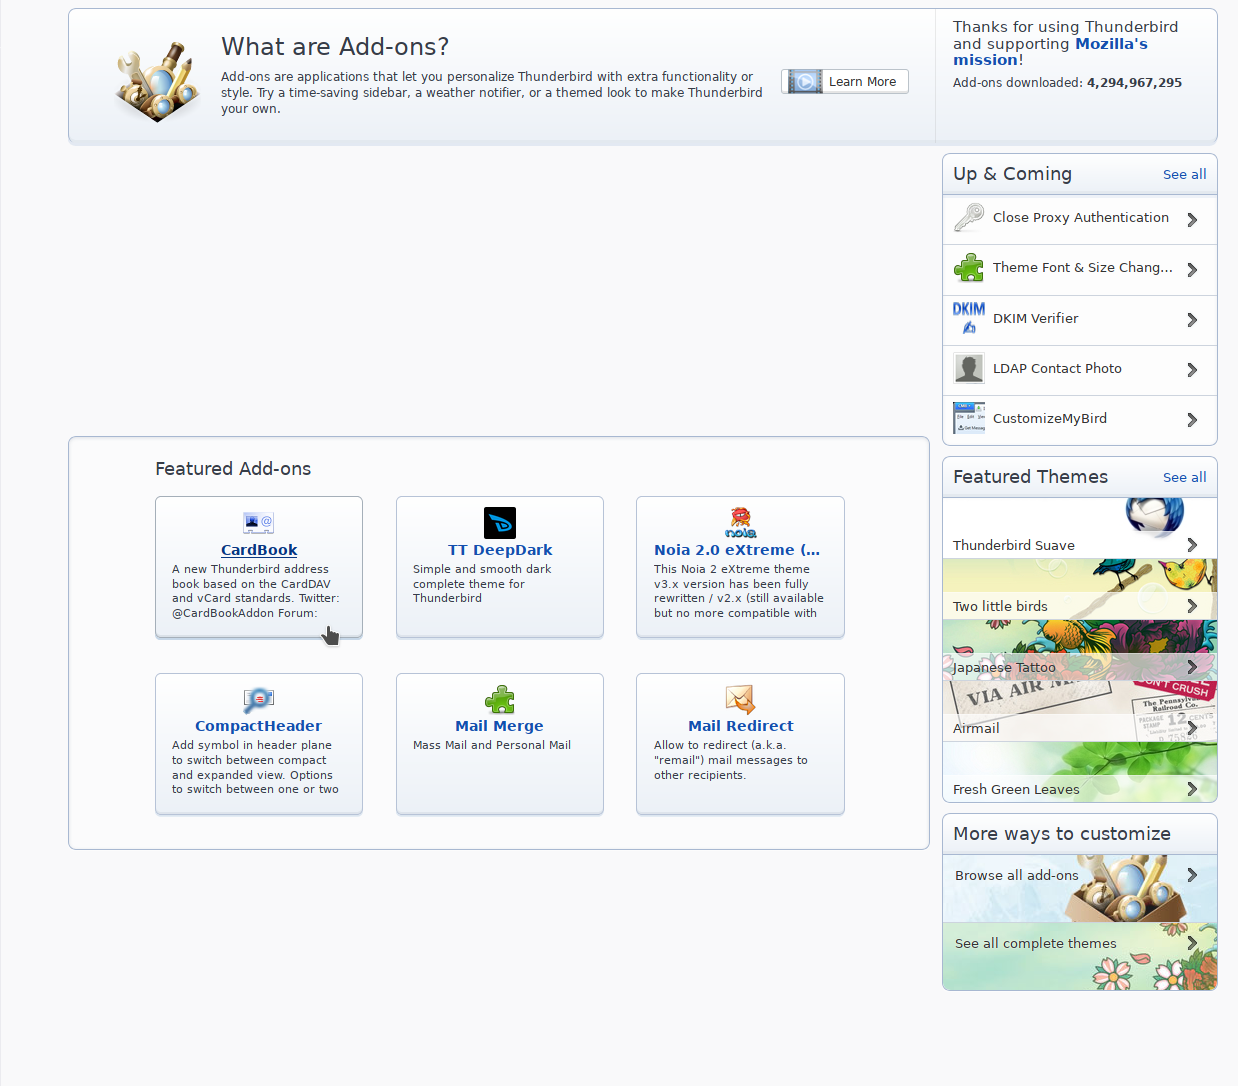
Select the Add-on "CardBook" or use the search to find the Add-on.
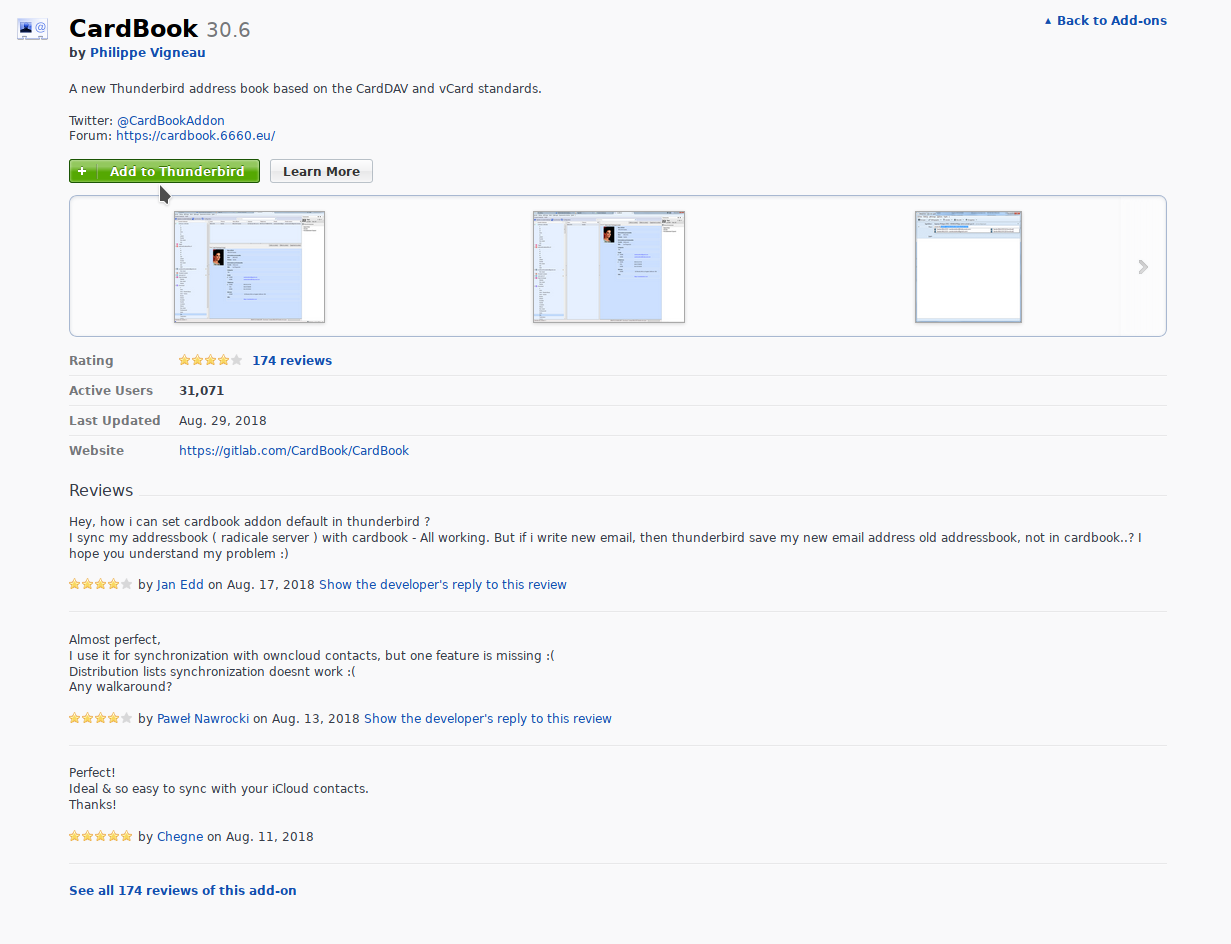
Click on "Add to Thunderbird" to install the address book function.
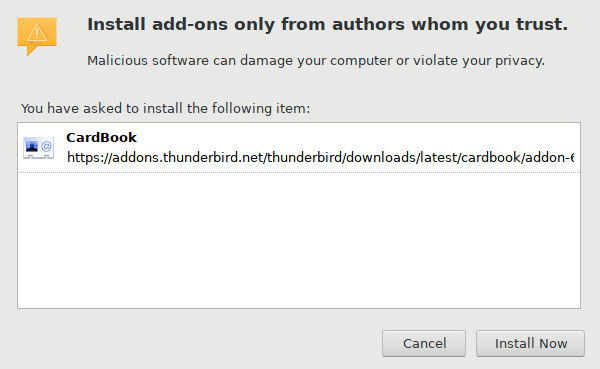
Click on "Install Now" to install Cardbook. To successfully complete the installation, restart Thunderbird.
Step 3
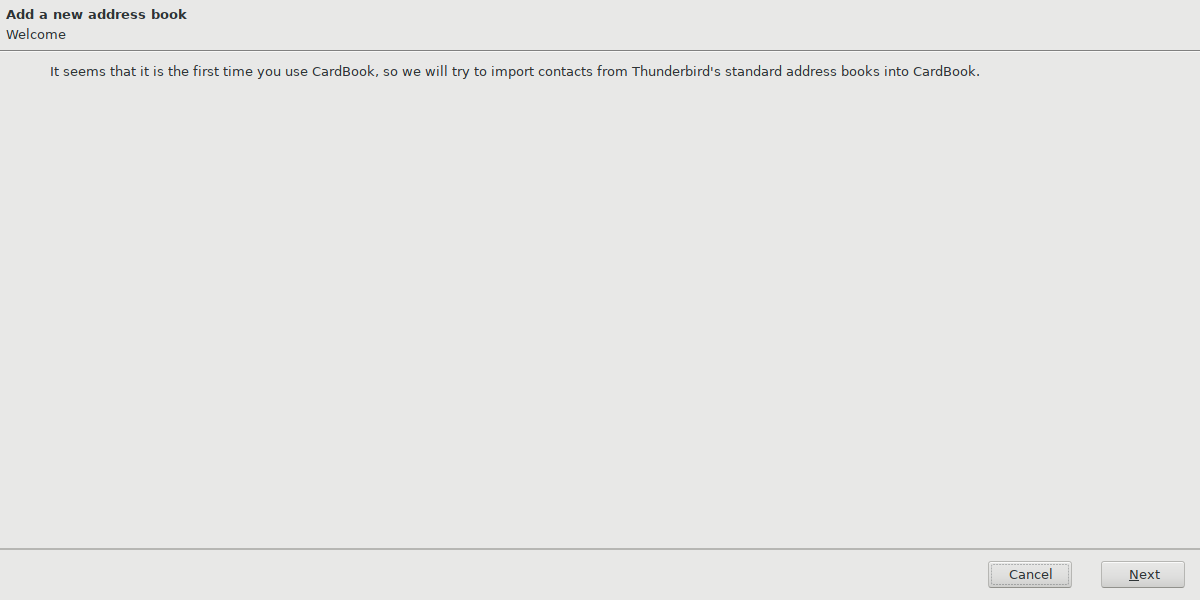
After the restart, Cardbook will prompt you to migrate any existing Address books into the Add-on.
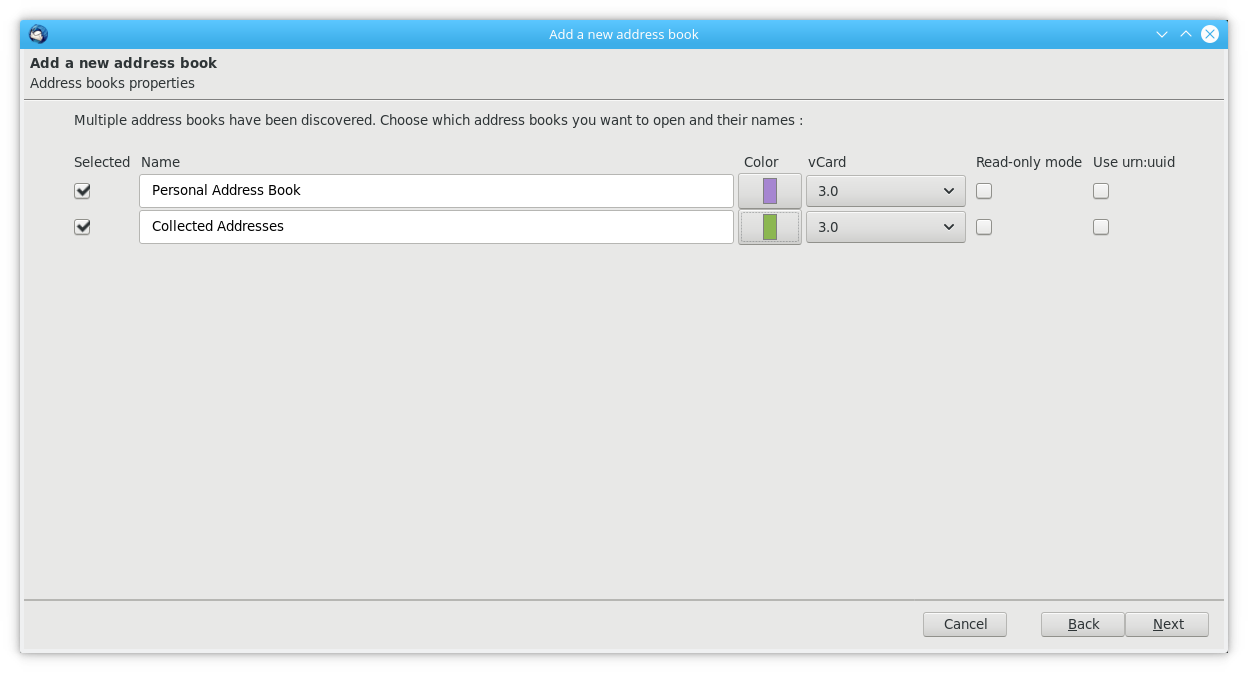
Do this for all address books. Otherwise you will not be able to access them.
Please ensure that you have changed the "vCard" settings to 3.0.
Step 5
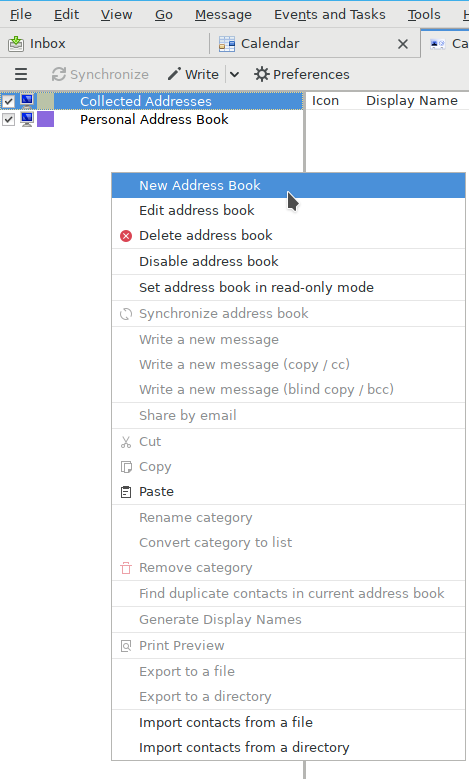
Right click in an empty area underneath your local address books and select "New Address Book"

Step 7
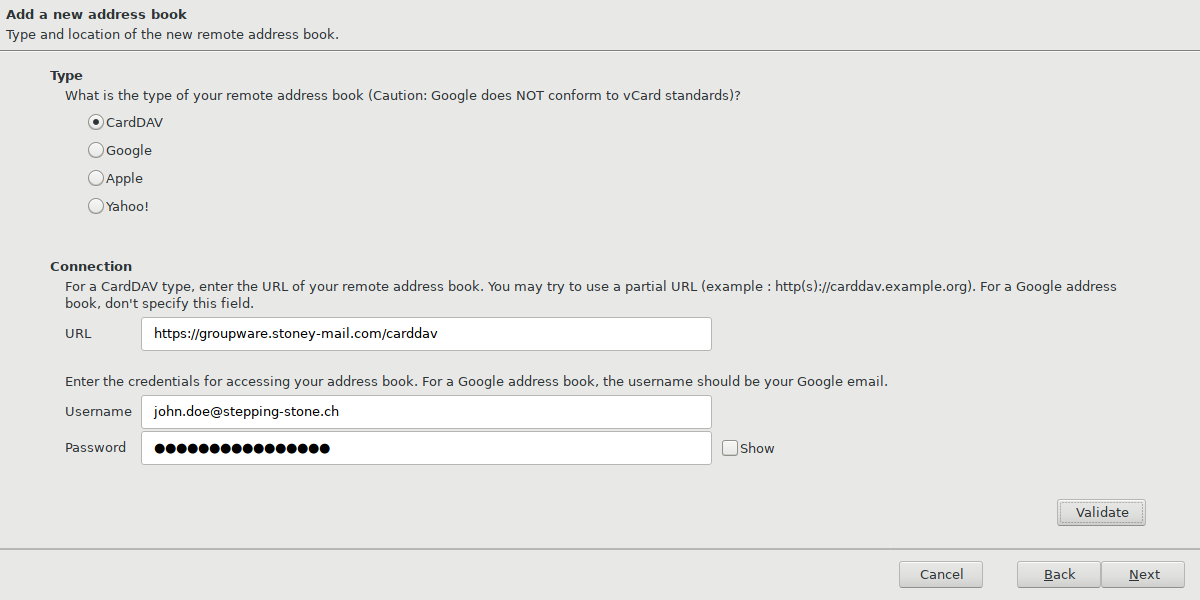
Select "CardDAV" and enter "/carddav" or the URL of your e-mail groupware.
For example: https://groupware.stoney-mail.com/carddav.
Enter the user name and password for your stoney mail account.
Click "Validate" to check the settings before continuing.
Step 8
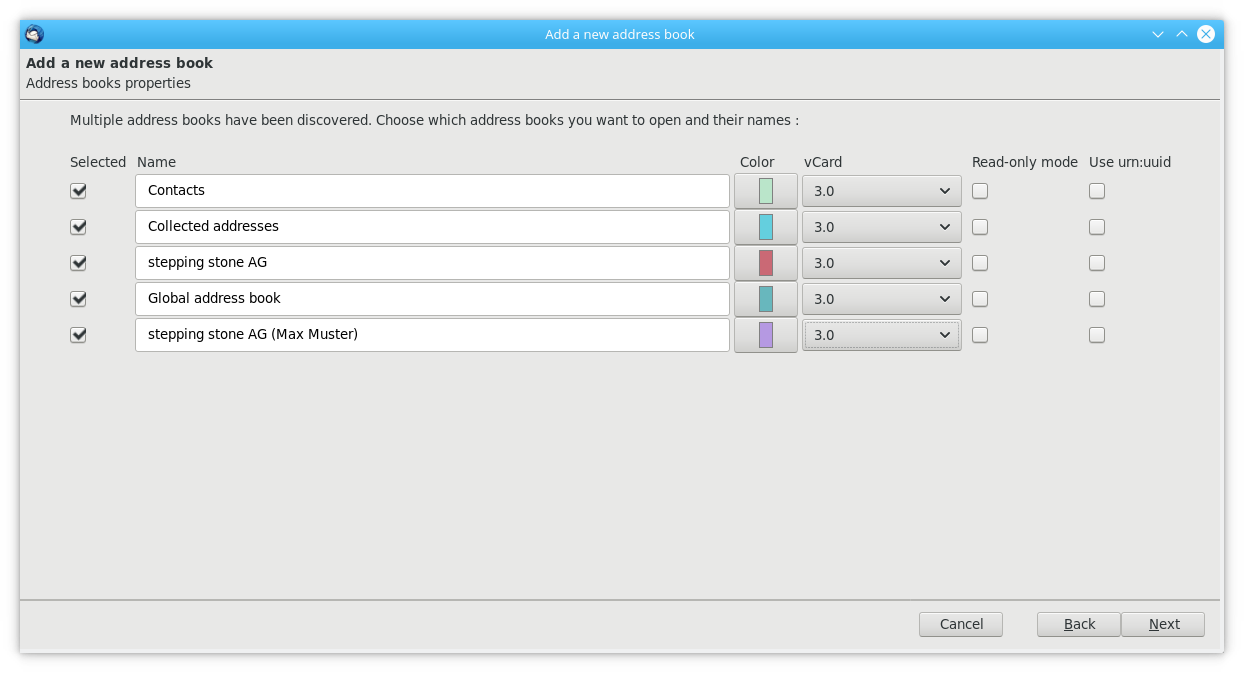
Select the address books you would like to synchronize.
Change the "vCard" to 3.0.
Only change the "Use urn:uuid" settings if you know what you are doing.
The settings "Name" and "Color" can be set to your liking.
If you added address books you do not have write permissions for, select the "Read-only mode" checkbox. Permissions are not checked automatically.
Step 9

Your address books are added. They have a small planet symbol in front of them if they are synchronized with a remote location and a lock on the right side if they are read-only.
Step 10
Your address book in Thunderbird is now configured correctly.
In the Thunderbird Calendar manual, we will show you how to add your calendar to Thunderbird.
Thank you for using our Mail Services.